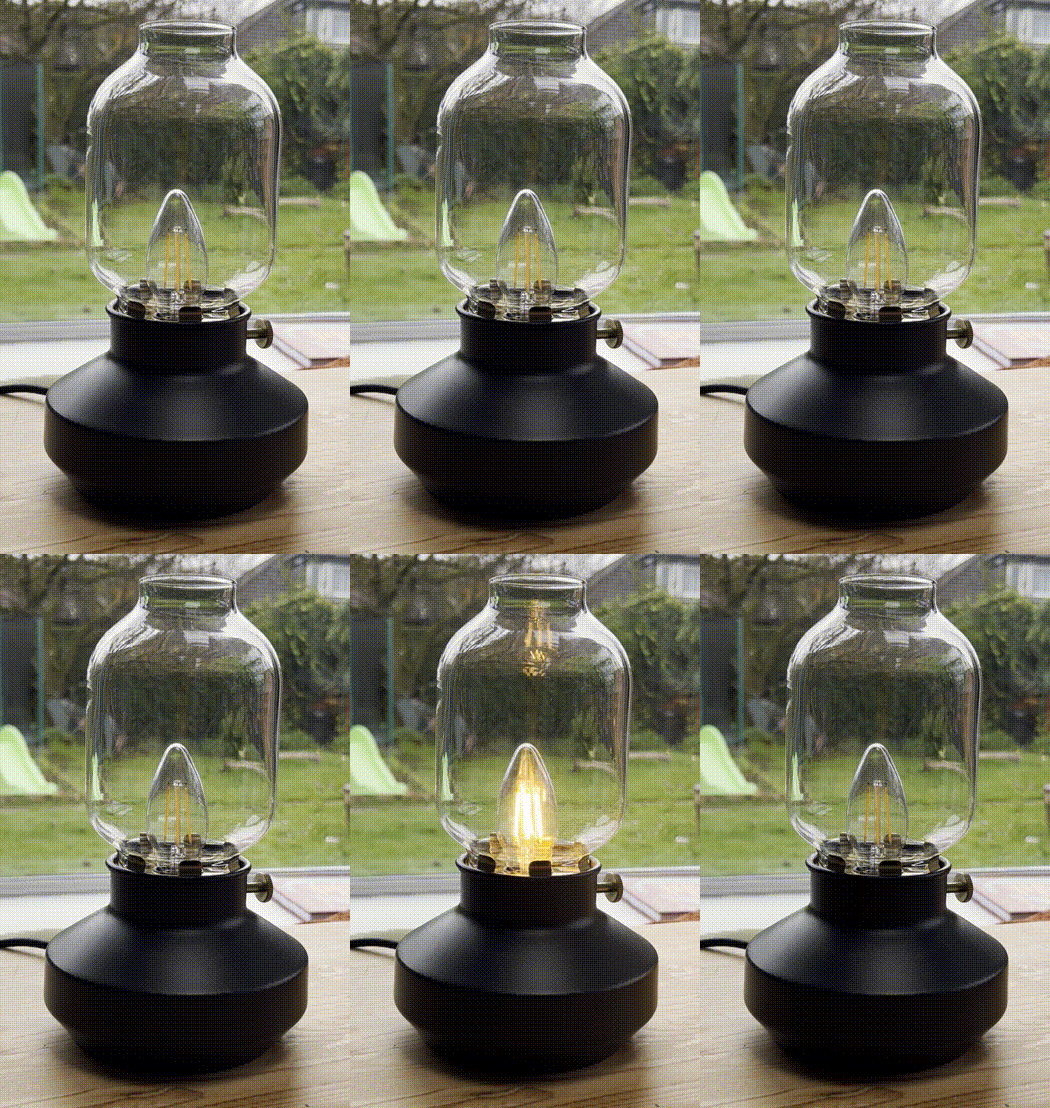
LoRa enabling an IKEA Tärnaby table lamp
This lamp now detects shenanigans
Date:
[]
Views: [3292]
Categories:
[projects]
Tags:
[arduino],
[lora],
[ikea]
With twin toddler boys roaming feral around our house, shenanigans are never far away. This fear is only compounded at night when they’re "asleep" in their room downstairs and my wife and I are upstairs in ours.
To mitigate the amount of carnage they can unleash while we're asleep, we needed an early warning system to alert us when they’d escaped their room — enter, the LoRa-enabled IKEA Tärnaby table lamp.

This lamp sits on the bedside table next to my bed, and when it's night and the boys' door gets opened, it turns on thanks to a little battery-powered sensor pack above their door.

Warning
This guide involves mucking about with mains electricity, so the usual warnings apply that you should never do anything, ever.
Theory of Operation
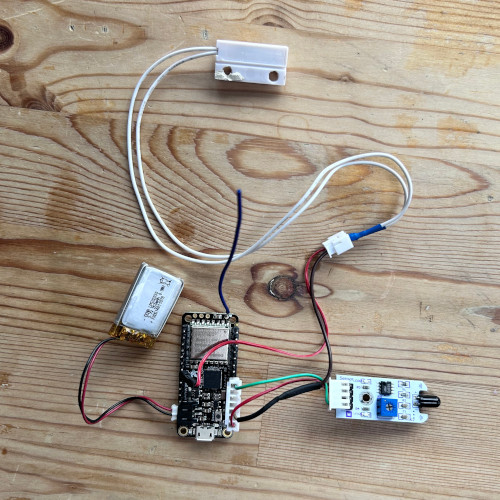
This project is split across two pieces of hardware: the lamp and the sensor pack. Both are built on top of Adafruit Feather M0 boards with RFM95 LoRa Radios. LoRa is a novel method of sending digital information across the airwaves by spreading data across the frequency spectrum as chirps rather than blasting information on a single channel. This allows it to have a fantastic signal-to-noise ratio, low power consumption, and great coverage. It’s not ideal in high-data-rate situations, but if you just want to indicate a door has opened without draining a battery, it’s perfect.
The sensor pack contains a magnetic reed switch and a light sensor. The light sensor is used to determine if it’s "bedtime" in the boys' room; only when the light levels drop below a certain threshold will the lamp be primed for action. This saves power in the sensor pack by ensuring it’s never transmitting during the day.
Once it’s officially night-time according to the sensor pack, it waits for a change in the reed switch's state as the door opens and closes. When the door is closed, the system is primed. When the door opens, the signal is transmitted to the lamp, which will then switch on using a mechanical relay switch, hopefully waking me up in time to catch the kids before they get their little mitts on Dad’s Lego.
All the code is available here on GitHub. It's a PlatformIO project built in VSCode and relies heavily on the RadioHead library.
Shopping List
- Adafruit Feather M0 with RFM95 LoRa Radio - 900MHz - RadioFruit
- Adafruit Mini Relay FeatherWing
- Surface Mount Wired NC Door Sensor Alarm Magnetic Reed Switch White
- Photosensitive Sensor by Velleman
- Lithium Polymer battery 3.7V 250mAh
- Adafruit Micro Lipo w/MicroUSB Jack - USB LiIon/LiPoly charger
- AC DC Switching Power Supply Module, AC 220V To DC 5V
- Wire, heat shrink, screw-twist connectors, plumber's tape, gumption, etc
Sensor Pack and Transmission
The main focus of this code is to get as much battery life as possible out of the little 250mAh battery. Currently, it can go a couple of months between charges, which is impressive. This is achieved by making use of the Adafruit SleepyDog library to put the device into a deep sleep between super-loops. Instead of always polling the reed switch and luminance sensor, the door sensor code is interrupt-driven and only reacts when the state of the GPIO changes that the switch is hooked up to. When a change of state is noticed, then on the next loop the luminance is checked to see if it’s night-time, and a transmission can take place. Power is also saved by turning off the on-board LED, transmitting on the lowest power possible, and only waking the device every 3 seconds to run through the state machine.
The code is incredibly simple, with the main loop looking something like this:
void loop() {
    static bool first_loop = true;
    static bool door_open_previously = false;
    bool perform_tx = false;
    bool door_open = false;
    blink_code status = BLINK_NOTHING_HAPPENED;

    door_open = door_is_open();

    if (!first_loop) {
        /* Tx a packet if the door has changed state and
         * there is enough light
        */
        if (door_open_previously != door_open) {
            status = BLINK_DOOR_CHANGED;
            if (luminance_read() < LUMINANCE_THRESHOLD) {
                perform_tx = true;
            }
        }
    }
    else {
        /* Always Tx on boot */
        perform_tx = true;
        status = BLINK_FIRST_LOOP;
    }

    /* Tx a packet if it's required */
    if (perform_tx) {
        /* Build packet */
        rf_packet packet = {
            .door_open = door_open
        };

        /* Transmit */
        if (radio_tx(&packet)) {
            status = BLINK_TX_SUCCESS;
        }
        else {
            status = BLINK_TX_FAILURE;
        }
    }

    /* Status indicator - only used if enabled in config */
    blink_led(status);

    /* Tidy up operations */
    radio_sleep();
    first_loop = false;
    door_open_previously = door_open;

    /* Sleep till next loop */
    Watchdog.sleep(SLEEP_MS);

    /* WDT Kick */
    Watchdog.reset();
    Watchdog.enable(WDT_MS); /* reenable required after sleep */
}
I've pulled some of the extraneous code out of this example for brevity. The full code can be seen here on GitHub.
The sensor pack is a bit of a rat's nest and lives inside an old headphone case, which I used a belt-loop punch to knock a hole through for the phototransistor. I de-soldered the status LED on the light sensor board to save some additional power.

The Lamp and LoRa Receiver
I’m hoping a little vagueness in this section will mean only those with the relevant experience can read between the lines on how to wire this up. You’re messing with mains electricity here, so be careful about dying, etc.
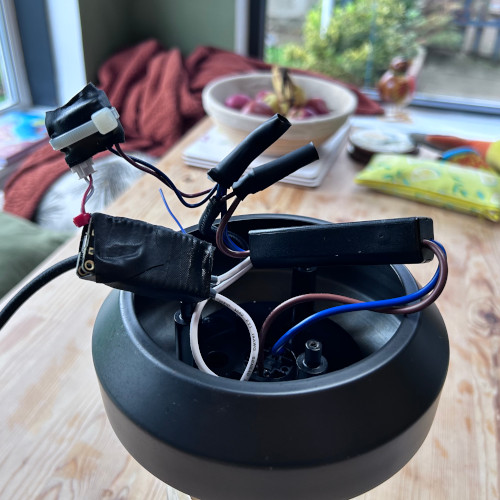
Two main chops and splices were required of the lamp's electronics to wire all this up. The power input gets spliced into the AC/DC PSU module to get 5V into the microcontroller, and the output of the triac dimmer circuit is routed via the relay switch in the Adafruit Mini Relay board. Everything is tidied up using screw-twist connectors, and all connections and boards are wrapped in plumber’s tape for insulation. Everything then fits quite nicely back into the lamp.

We don’t need to be precious about power consumption here since we're wired up to the mains. Every second, we check if any packets have been received by the radio; if so, we switch the lamp on for 30 seconds when the door is opened and switch it off when it's closed. The full version of the code is here on GitHub, but here’s the core of what it’s doing:
void loop() {
    rf_packet packet;
    uint8_t pkt_len = sizeof(rf_packet);
    uint8_t from;
    static uint16_t timeout_remaining = 0;

    /* Toggle light on each loop */
    blink_led();

    if (manager.recvfromAck((uint8_t *)&packet, &pkt_len, &from)) {
        Serial.printf("Door changed state: ");

        if (packet.door_open) {
            Serial.printf("OPEN\n");
            relay_open();
            timeout_remaining = LIGHT_TIMEOUT_SECONDS;
        }
        else {
            Serial.printf("CLOSED\n");
            relay_close();
            timeout_remaining = 0;
        }
    }

    if (timeout_remaining) {
        timeout_remaining--;
        if (!timeout_remaining) {
            Serial.printf("TIMEOUT\n");
            relay_close();
        }
    }

    /* 1 second between loops */
    delay(1000);
}
End Result
The end result is this lamp was useful for a couple of months and then got superseded by the boys actually sleeping through the whole night and not going on midnight rampages. I never quite got this project as finished as I'd like prior to it not being required; I built a whole bloody 3D printer so I could learn OpenSCAD and make a proper enclosure for the sensor-pack, but never bottomed out the design.
Still, I had a lot of fun building it, and it was a great way to learn about LoRa — it’s a technology many people are experimenting with in my industry. Hands-on experience with any new technology like this is invaluable before trying to talk about it in a meeting!
